
LIGHTSHOWS FOR NOOBS: AN INTRODUCTION
By Sarcaste
Introduction
So. You just got your first Launchpad off of Amazon days after watching Madeon or M4Sonic. You’ve downloaded LP Pro’s project files, and played around with them. You know a little about Ableton, but not that much. You saw Nev or Recuest’s videos, and a question bothered you:
“How on earth does they make those insane lightshows???”
Well, this guide is for you then. I don’t promise I’ll make the new Nev out of you before the end of this guide, but hopefully you’ll pick up a thing or two about how to do lightshows. This guide will show you the basics to MIDI effects and how to use them in order to create awesome lights. Alright, Sarcaste, shut up already and get to the good stuff!!!
Prerequisites
In order to make awesome lightshows, you will need a small number of things:
- A Launchpad (duh) preferably a Launchpad S. The S is much better for lightshows since it is faster (smaller latency, don’t worry about it if you don’t know what it is) and has brighter lights then the original.
- Ableton Live (No way) 8 or higher. The images included in this guide are taken from Live 9.0.1. , So the look and feel might be different from Live 8, but I assure you the principles are the same.
- A good computer. For fast lightshows in complex project files, it is recommended to have at least 4 GB of RAM. Mac or PC is the same for project files since the .als files (.AbletonLiveSet in case you were wondering) are universal.
Getting Started
Start with a clean, new Project. Open up Live, go under File and select New Live Set, or press CMD+N / CTRL+N.

You Should have this:

You can delete the two Audio Tracks, as well as the two tracks on the far right, A Reverb and B Delay.
You are left with two MIDI tracks: one will be for your audio samples, the other for your lights. Feel free to name these and color-code them as you want. Now you can make your audio samples in a drum rack inside your selected MIDI track. When that is done, press the I-O button on your far right (it stand for INPUTS-OUTPUTS). A new row of options should appear in the Session View. Head over to the option concerning your Lights track:
  |
Make sure your MIDI From is set to the Audio Track. In this case my track is named "Sarcaste".
Make sure to use these EXACT settings. Anything else WILL NOT WORK.
|
Now normally with your Audio Track Armed (the red button on the bottom of the track is selected), when you press a button in User 1 Mode on your Launchpad, it should light up. Great Job! You’re far from being the next Madeon, but hey, remember: The longest of journeys starts with the smallest of steps. Let’s move on now to the most interesting part: MIDI Effects.
MIDI Effects
Introduction
MIDI stands for Musical Instrument Digital Interface. It is the universal language for most keyboards, MPC's, and other instruments, to be able to communicate with DAWs (Digital Audio Workstations) like Ableton or FL Studio. It’s also what your Launchpad uses. What we’re going to do is now that we have your Launchpad connected using MIDI, we will apply affects to that MIDI to get all sorts of weird light effects. I’m going to take you through the basics of every MIDI Effect, and show you how to use them. First, here is how to access them:

Velocity
What’s the first thing you notice in awesome LP lightshows? Colors. To change the color of a light, simply drag and drop a Velocity effect into your devices on your Lights MIDI track we created before (this is how to introduce any effect into your lightshow by the way).
This is what it should look like:

See that Out Hi knob? That’s what we’re going to be interested in. By twisting the knob (therefore changing the value) normally different colors should appear. Great! But how do I get the color I want? Well, first off there is only four main colors: Green, Yellow, Red, and Amber/Orange. The other 123 values are weaker versions of these four colors. Here are the values for a few lights:
Color
|
Bright Green
|
Bright Yellow
|
Bright
Red
|
Bright
Orange
| ||||
Value
|
56
|
127
|
7
|
83
|
Awesome! So you can now choose lights. You can also play with the Random know; changing it’s value will make it so that every time you hit a pad, it will have a random color. Pretty cool right?
Pitch
The Pitch effect is very handy if you want the lights to be further away on the Launchpad then where the sample actually is . For example, your sample is on the bottom-left-most pad of your LP, but you want a light to activate at the other corner. Well, this will help you achieve that. This is what the Pitch Effect should look like:

Extremely simple, isn’t it? Just change the value of the pitch to have your light show up somewhere other then where your finger presses it. For our previous example, we would then want to knock up the knob to +63. Easy right?
Chord
The Chord effect is what you can use normally with an instrument to automatically play chords while only hitting one pad. We are using the same principle here to light up multiple pads at the same time: this is what the device looks like:

The Chord device is also very simple, and is similar to the pitch. The difference is, this one allows you to light up multiple pads at the same time, allowing you to make lines and shapes. Sick right? Just change the values in the chord device to achieve the shape you want. For example, the following would be a straight line:

Note Length
The purpose of this device is to, well, your probably got it, change the duration of the light. This is what it looks like:

The “Length” knob is what is most interesting to us: (the Gate effect can create some cool effects, just play around with it) it allows us to change for how long the light stays on after your finger leaves the pad. It can be either a very short or a very long time. The minimum is 10 milliseconds while the maximum is a full minute (or 60 seconds, in case you’ve never looked at the time before). This Note Length device is the equivalent to Release in Audio, but this is applied to lights. Now what is also is the “Note On” button. When you click it, it will turn orange and will say “Note Off”. When this is activated, the light will actually turn on only when your finger leaves the pad. This expands the possibilities even more. Just think of all you can do with this. It’s over 9000!
Arpeggiator
So now you know to make colored shapes that can last for a certain time… But you’re still wondering how to animate these shapes and make them move around in crazy patterns. The Arpeggiator is what you need for animation. It is a little bit more complex then the other devices, so try and focus. This is what it looks like:

Basically, what the Arpegiator does is that it plays midi notes in “Arpeggio”, or in a rhythm. Here you can modify the pattern of this rhythm: the Rate knob changes the speed, the “Repeats” knob determines how many times it should repeat the pattern before stopping, and the Style is the actual pattern your MIDI signal will take.
So now you normally achieve a blinking light. But what if you want it to move around? The Steps Knob decides how many movements your light does in one pattern. The Distance Knob decides how many pads away the next light is going to be compared to the last one. For example: if you select Steps: 1 and Distance: +4 st, then you will get a light that will start at your finger, then light up the fourth pad that follows. Got it? I’ll show you later on how to get even more complex laters in the MIDI Combinations chapter.
Random
The Random Device is useful for creating random light patterns, and some other cool stuff such as multiple samples on a single pad. This is what it the device looks like:

The Chance Knob modifies the Chance that when you hit a pad, its pitch will be altered. The Choices knob is to determine the “range” of how far the pitch can go. So for example if you choose 50% Chance with 1 Choice, then you have a 50% probability that the pad you will play will light up the pad next to it.
Scale
The Scale effect isn’t very useful to us; it is a device usually used for harmonics and production, so it isn’t exactly useful to us (although I am interested in discovering how people can use this in lightshows). So I will skip this device to move on to the next very important one: the MIDI Effect Rack.
Chains
What’s A Chain?
In Ableton Live, a Chain is a row of devices and effects in the same track. For example, in a light shown, your chain might look like this:

Even though you may achieve the most badass of effects, there remains one problem: this Chain will apply to every pad on your LP. What if you want to have different lights for different samples? Well, the answer is much simpler then you think: the MIDI Effect Rack.
MIDI Effect Racks
As you may have guessed, MIDI Effect Racks allow us to separate different animations for different pads. Therefore you can have up to 64 lightshows per Rack. Sweet! Now insert a MIDI rack in your devices. It will look like this:

It looks pretty empty, right? Let’s start by selecting the chain in the previous example, and let’s drag & drop it inside the box where it says “Drop MIDI Effects Here”. It should then look like this:

Ok Great. But how do I assign this Chain to just one pad? Start by pressing this button:

Your Chain should appear here. It’s content is displayed here.
You can rename your Chain by pressing CTRL+R / CMD +R. Now what you want to do is press the “Key” Button on the far right. It’ll open this:

See that green Bar under the Piano roll? That’s the “Range” of your Chain. Right now, since the green bar is extended over the whole range, it means that every light on your Launchpad will use the light effects in the chain. You can change this by changing the size and location of the green bar to fit your need. For example, if I wanted my chain to be just for note C3, then I would have this:

There you go! Now only the pad corresponding to C3 will light up on your Launchpad. Now you can even more Chains by dragging new MIDI effects where it says “Drop MIDI Effects Here”. You’re one step closer to being a Launchpad Jedi!
Chain Selection
So now you’re done with your awesome lightshow, you have all your Chains nicely lined up in your MIDI effect rack. But what if you have more then one Audio track you want lightshows for? What if you have separate Intro, Chorus and Verse tracks, and each and individual lightshows? How can you quickly select the right lights for the right samples? I will show you the simplest technique possible, one introduced by Nev. This consists in MIDI-mapping the round buttons on the side of your Launchpad to the Arm buttons on your Audio Tracks.
Start by clicking on the MIDI- Learn tab on the top right corner of your screen:
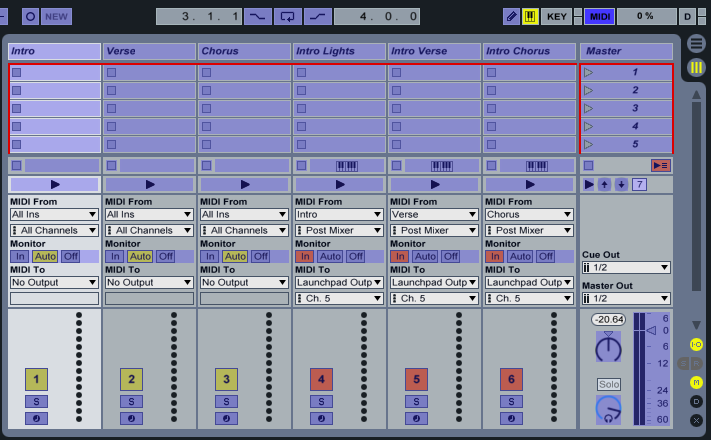
Now Click on the Arm Button of your first Audio Track; then press the pad you want to MIDI-mapped on your Launchpad. Repeat this step until every AUDIO TRACK you desire is MIDI-mapped to the round buttons on the right of your LP. Also you need to make sure that the MIDI From option of your Lightshow tracks are set to the corresponding Audio Track, for example Intro Lights is set to Intro, etc. When you are done MIDI-mapping, click again the MIDI button to exit out of MIDI-Mapping Mode. Now, when you press the round buttons on the side of your Launchpad, it should change between Audio Tracks. Awesome.
MIDI Combinations
What Are You Talking About?
Surprisingly enough, the order in which you place MIDI effects in a Chain affects the final output on your Launchpad. Many of these can lead to surprising results, which I will detail here.
The Note Length/Arpeggiator
Most combos involve the arpeggiator, since it is the most complex and creative tool of all MIDI Effects. The first of these combinations involves the Note Length effect. If you put the Note Length effect before the Arpeggiator, it will act like the “Repeat” Knob in the Arpeggiator, and will determine for how long the pattern will play. But if you place the note Length after, it will change how long each light stays on. This is great for a “Fill” effect, because each light stays on after the pattern moved on.
The Chord/Arpeggiator
Placing a Chord before an Arpeggiator will make a single light move up the notes of the chord, while placing the Chord After the Arpeggiator while make the multiple lights of the chord blink without moving.
The Chord/Chord
You might find that it is a heavy burden and a long job to make lights that completely cover the Launchpad. You can ease this by using multiple Chords in series. When you put two chords in a series, the one on the left will “multiply” the second one. For example:

2* 2* 4* 4 = 64
Therefore this chain will fill the whole Launchpad with Lights. Easy peasy lemon queasy right?
Recording Tips
Here are a few tips for correctly recording lightshows with a camera:
-Turn off Auto-Exposure on your Camera. If you don’t, the lights will appear way brighter then what they actually are.
-If you have a Launchpad S, put it in Power: Full Mode in the startup Menu. (To access the startup menu, keep Session, User 1, User 2 and Mixer Modes pressed while you plug your USB chord into your computer).
-Record in daylight, not artificial light (unless you have professional lighting). The opposite results in grainy- looking film, which deteriorates the quality of the video.
-Steady your camera. There is nothing more unprofessional then recording a video on a camera that moves all over the place.
-EDIT THE VIDEO. For the love of God, we do not want to see you plugging in your Launchpad or see your mom walking in.
-Try and record with a real camera, not just your grandma’s cellphone. 720p is a minimum for a professional-looking video.
Afterword
This is pretty much it for now! As I told you in the beginning, you might not be Madeon or Zambuseta just yet, but it will come, and this guide was the good place to start. Feel free to edit this text if you see errors, or add more to any of the chapters. Thank you for taking your time to read this! I hope you’ve enjoyed it as much as did writing it for you n00bs. (Just kidding, you guys are l33t.) Feel free to come say hi on my Facebook Page:
See you around!
Useful Links
Here are a few links to videos and tutorials that you would enjoy:
Nev’s Spectrum Cover:
Nev’s Tetris Cover:
Recuest’s Raise Your Fist Cover:
Kill the Robot Novation Performance:
Kill the Robot Tutorial:
ULT1MOD’s tutorial:
The best guide I have found for combining audio and lightshow
ReplyDeletehttps://www.youtube.com/watch?v=0CJmQEvLAgQ
This guide can apply for live 8 too..amazing stuff .
ReplyDeleteThis guide can apply for live 8 too..amazing stuff .
ReplyDeleteBut what if you want to light up more pads other than the 6 that are provided in one chord, but don't want the "multiply" feature by putting another chord right next to it? Would you just put it in another chain?
ReplyDeleteI did the velocity stuff, but it did not work. Is this because im on launchpad mini or is it something else?
ReplyDeletei am on Launchpad MK2 but it doesnt work either, phony teacher i say
Deletewut
ReplyDeletewut
ReplyDeleteThank you! This is a really really nice guide, and it works flawlessly!
ReplyDeletehi
ReplyDeleteDo any of you know Hazbin Hotel o Hellova Boss
ReplyDelete