Showing posts with label Drum racks. Show all posts

Sunday, May 25, 2014

How to put more than one sample in a single button (drum rack)

If you want to press a pad in the drum rack and have more than one sample (simultaneously or alternating), you will learn how to do it here.


Alternating between samples:

First drag a "Random" device into the desired pad. Set its "Chance" parameter to 100% and its mode to "Alt". 
Set the "Choice" parameter to the number of samples that you want to alternate between; (in this case I will use 3).


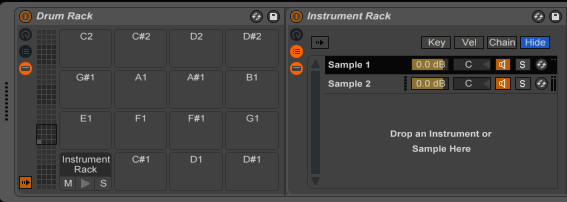
In Ableton's browser, go to Instruments and drag an Instrument Rack to the right of your Random. Open the Chains view by clicking the middle left button.


Drag your samples inside and open the Key View. You will notice that every time you press the pad, the key changes.


Drag the green bars to the keys that are lighting up in red (one sample to each key).


Done!


Having multiple samples playing simultaneously in the same pad

Drag an Instrument Rack to the pad of your choice and drag the samples inside (if you don't know how to do this follow the steps above.)


Done!

Monday, May 19, 2014

How to change the length of a sample in the drum rack

In this tutorial you will learn to change the length of a sample in the drum rack, being able to launch it just by pressing it instead of holding it.

There are two ways to do this:

Method 1- Increase the "Release" parameter in directly inside the sample. Adjust the desired time or simply put it as 60s.


Method 2- In Ableton's browser, go to MIDI effects and drag the "Note Length" effect to your sample.
Adjust the "Length" parameter to the desired time or simply put it as 60s.


You can now press the button quickly and the sound will not cut. This is very useful for drums, since you won't have to wait for a kick or snare to finish making its sound to release the button.

Sunday, May 18, 2014

The User 1 Mode

In the User 1 mode, the Launchpad can be used to play note data into Live’s MIDI tracks (if no custom MIDI mappings have been made).

The user 1 mode is used mainly to control drum racks and other Live instruments/plugins such as the Grand Piano and Sylenth1.
The user 1 is capable of producing high quality lightshows.


Here's a video showing how the user modes work:


Creating more than a drum rack (switching pages)

If you have watched Nev's videos you probably noticed that he uses the side buttons to change between drum racks.
In this tutorial you will learn how to do this.

First, create a drum rack (or select yours if it already exists) and press (Ctrl + G) or (Cmd + G) to group it.


Now click the middle button on the left side.


After that, drag a new drum rack (or more than one) to this area:


Then Select "Chain" and move the square of each drum rack, keeping them in different chains.


Now press (Ctrl + M) or (Cmd + M) to open the MIDI mapper, or simply click on this icon on the right upper corner:


Click on the chains bar and press the first and last buttons in the row that you want to map to change the "Pages".


Now you will see in the left side the mapping. Change the max vaule from 127 to the number of drum racks that you created (including 0). In this case I created 4 drum racks, so I'll put 3, having the numbers [0,1,2,3].


Press (Ctrl + M) or (Cmd + M) again to close the MIDI mapper, or click on this icon on the right upper corner:


Done! Now when you press the desired side button you will switch the current drum rack!


Drum rack basics

There are a few ways to set up complex drum racks that allow bank switching and things of that nature, but we won't get into that here. With that said, this is the Basic drum rack tutorial:

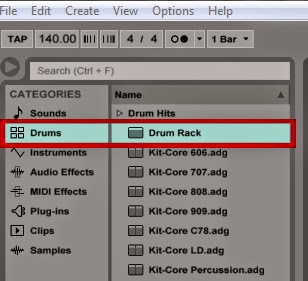
Find the "Drum rack" device here:


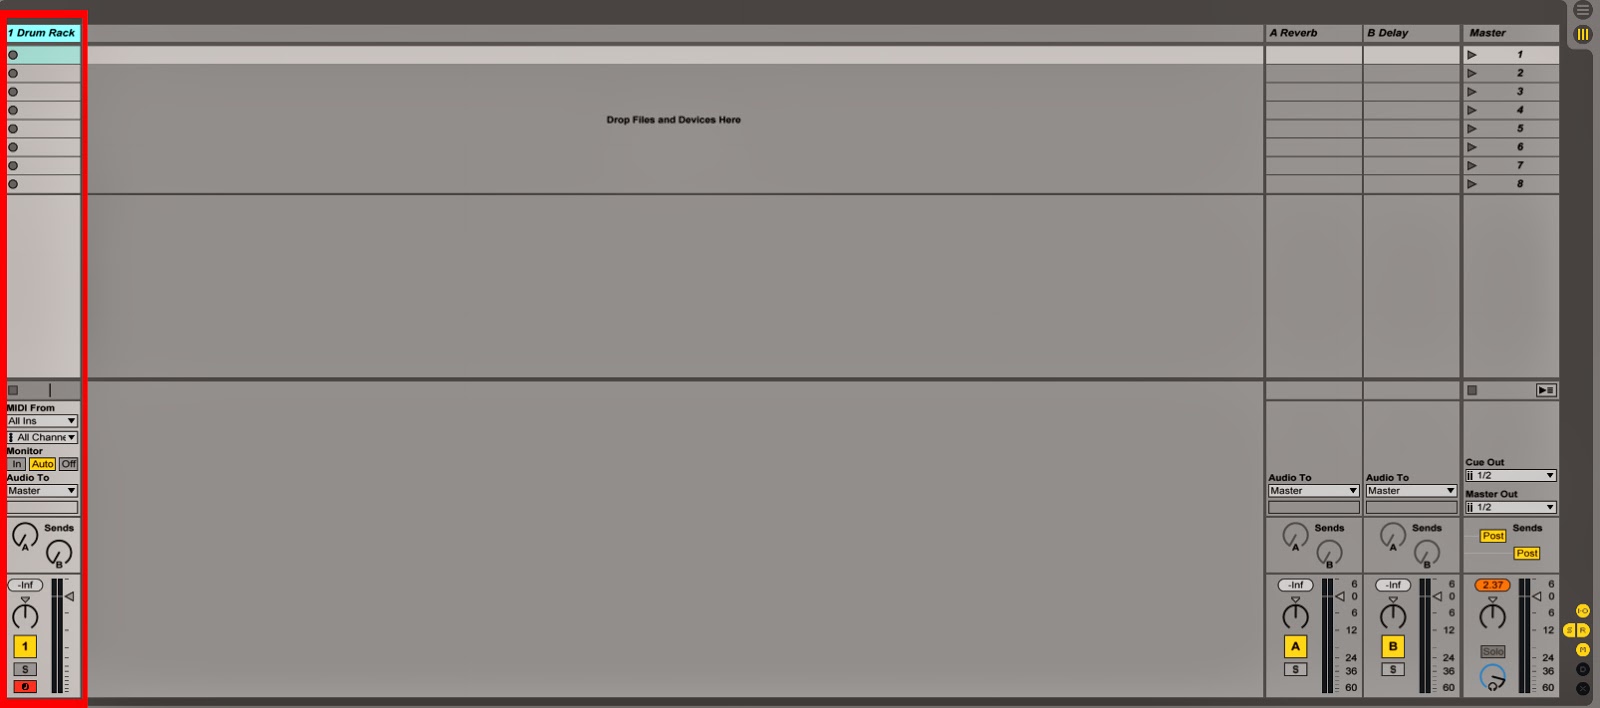
And drag it into the session view:

When you open the drum rack, the bottom of the screen with show 16 squares. You can drag .wav files into these squares, allowing you to play sounds. 


If you look near the right side of the last picture, you will see "Drop Audio Effects here". If you go to the audio effects tab, you can select what you want and drag it in. That gets to be quite advanced, though. 

Next part to User 1 tutorials coming soon, with more advanced Rack setups.

Slicing a sample to a drum rack

In this tutorial you will learn to cut samples from a song and using them in the drum rack.


First, import the desired audio file to an audio track and double click it.


You will notice the sound waves from the sample in the Detail View.


To zoom and navigate through the waves, drag the top bar (when you see this icon) up, down, right and left.


Make sure the "Warp" option is on and double-click on the 4th bar to create markers. To delete a marker, simply double-click it. 


After creating your markers, right click the sound wave and select "Slice to new MIDI track".


Select the "Warp Marker" option and hit "OK".


Ableton will now generate a new MIDI track with a drum rack. In this drum rack you will find your sample divided by the markers you created earlier.


You can now connect your launchpad and use user 1 mode to control the drum rack!